Showing posts with label Steak. Show all posts

Sunday, July 04, 2010

Steak fajitas!

I like to think of this meal as my first iPhone dinner since I used my new iPhone and the epicurious.com app to make the grocery list and cook it at Rick's new place.  One of the things that I've been looking forward to when I finally got an iPhone was this app!  As I'm sure is obvious, I'm a huge fan of epicurious.com, and I've been admiring the app on their website for quite some time now!  If anyone out there was any other awesome cooking related (or not) app suggestions, please send them my way!  I'm looking forward to playing...umm, using my iPhone for a long time to come!

Okay, so back to the meal.  Sadly, Rick and I haven't been cooking anything new recently or at all really.  With the holiday weekend, we decided that we going to change that.  We've been spending more time at his new place, and last weekend, he bought one of those tabletop gas grills at Lowes.  It's really cool and allows us to be able to grill on his back porch (one of the things that I love about his place).  While he was running some errands yesterday afternoon, I decided to check out the epicurious.com page for some ideas for dinner, and I came across this one.  I thought that it sounded yummy, and what better way to celebrate the 4th of July than with some Mexican!  LOL!  Based on the reviews on epicurious, I decided to marinate the steak for a few hours while we were at the pool.  I also added cumin to the lime juice marinade.  Being that we were cooking at Rick's place, I had to stock up on a couple of kitchen necessities to take over there including salt and pepper grinders and a juicer when I went to the new Harris Teeter to get steak.  I ended up getting the pre-cut fajita steak instead of doing the cutting myself.  We used 0.62 pounds which made a little bit more than enough for two (perfect for snacking on later).  The fajitas turned out great!  Using balsamic vinegar with those ingredients wasn't something that I would have thought to do but the onion (and green pepper) were a perfect compliment to the meat.  Given the small amount of meat that we used, I think that going with one onion and one green pepper and a whole pound of steak would be perfect for 4 servings which is what I'm recommending in my recipe here.  I look forward to making this one again!

Here's what we did...

Steak Fajitas with Lime and Cilantro
Ingredients
1 lb steak (I used the pre-cut fajita steak from the grocery store)
1 sweet onion, peeled and cut into wedges
1 green pepper, cut into strips
1cup chopped cilantro leaves
Juice of one lime
2 tablespoons balsamic vinegar
2 1/2 tablespoons extra virgin olive oil
2 teaspoons cumin
2 teaspoons salt and 
2 teaspoons fresh ground black pepper
Small torillas
Salsa of your choice
Sour cream (if desired)
Shredded cheddar cheese (if desired)

Directions
In a shallow dish, mix steak with lime juice, 1 teaspoon cumin, 1 teaspoon salt, 1 teaspoon pepper, and 1/4 cup cilantro.  Cover and place in the refirgerator to marinate for 1-2 hours.

In another bowl, mix onions and green pepper with 1/2 tablespoon oil, balsamic vinegar, 1/4 cup cilantro, 1 teaspoon cumin, 1 teaspoon salt, and 1 teaspoon pepper.  Cover and place in the refrigerator to marinate for 1-2 hours

Marinating time for both can be as short as 30 minutes if you do not have the full 1-2 hours.

Heat grill to medium heat.  Place the onion and pepper in a grill basket and cook for 15 minutes.  Remove the onions from the grill basket and place in a bowl.  Place steak in the grill basket and cook for 10 minutes.  Remove steak and add to the bowl with the onions.  Stir steak, veggies, and remaining cilantro together in the bowl. 

Toast tortillas on the grill for about 1 minute.

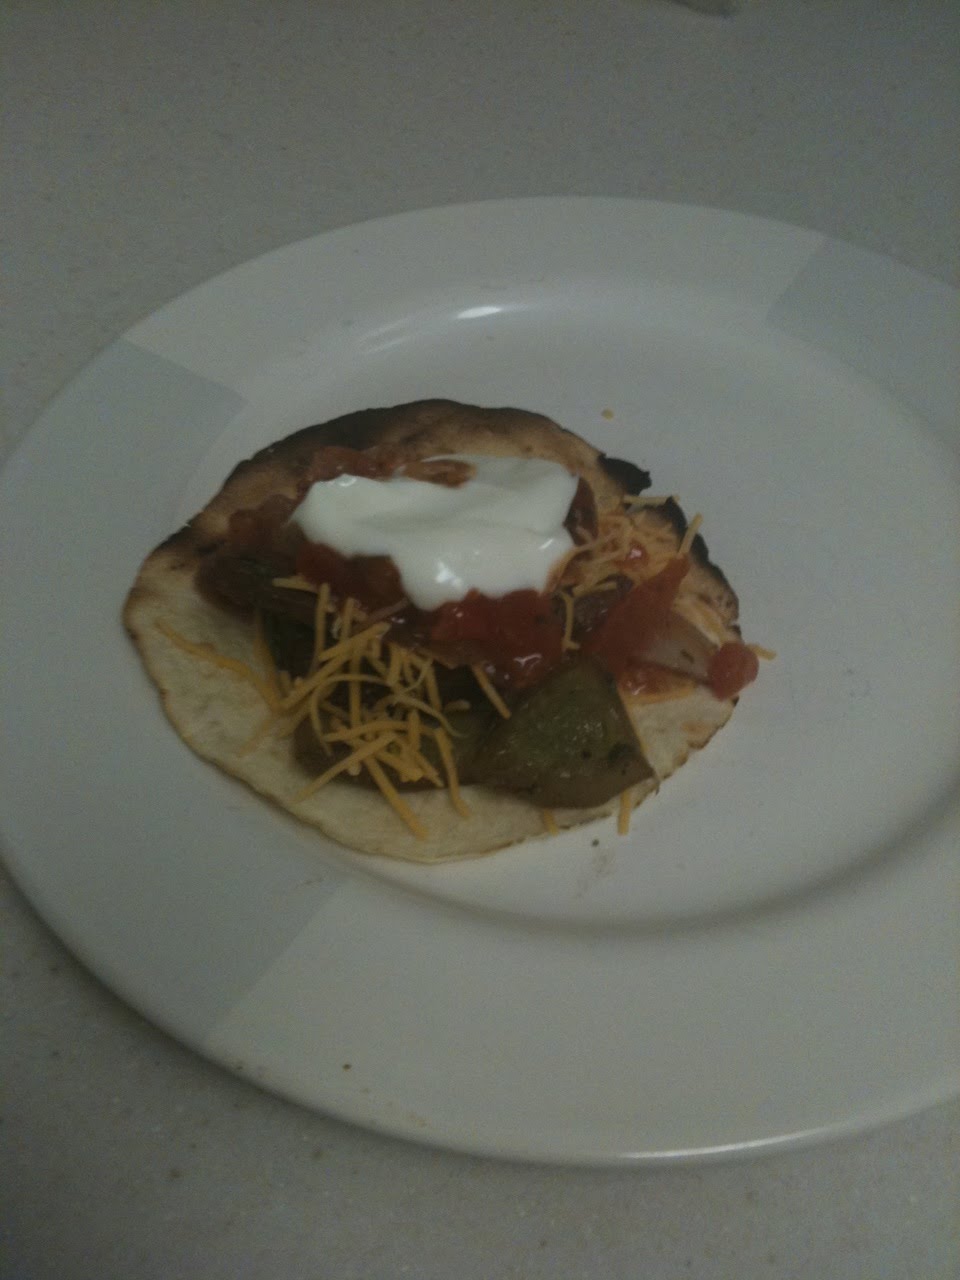
Serve steak, veggies, salsa, and cheese and sour cream (if desired) in wrapped tortillas.
Enjoy!

Monday, April 12, 2010

Flank Steak with Cucumber-Pepperoncini Relish...yep, it's another Greek inspired grillin' night

Rick was away for most of the weekend at the Masters, and while I had toyed with making some sort of mushroom-centric meal, I opted to go out to dinner with a friend on Friday and then had Homecoming for the College of Nursing on Saturday.  Oh well.  For dinner this evening, I had tossed around a couple of ideas...some sort of casserole, but the weather is so nice that it would've been a shame not to spend part of it at the grill.  I went searching myrecipes.com for something new to try, and I came across this recipe for flank steak with cucumber-pepperoncini relish.  It was featured in Cooking Light magazine so it would be perfect for our goal of eating better!  I also liked it because it gave me an excuse to make my famous tzatziki sauce
to serve with grilled pitas that we brushed with olive oil and Italian Seasoning (from the grinder).  This time, I also added a little bit of the Garlic and Herb grinder that we used with the Brussels sprouts.  Instead of serving the cucumber relish on top of the steak, we ate it on the side.  And I gotta say, it made fabulous leftovers today!

Here's what we did...

Flank Steak with Cucumber-Pepperoncini Relish
Ingredients
  • 1  (1-pound) flank steak, trimmed
  • 4 cloves of garlic, minced
  • 1/2  teaspoon  salt
  • 1/2  teaspoon  black pepper
  • Cooking spray
  • 2  tablespoons pickled pepperoncini pepper pickling liquid
  • 2  tablespoons extra-virgin olive oil
  • 1 tablespoon  Dijon mustard
  • 1  pickled pepperoncini pepper, chopped
  • 2  tablespoons chopped fresh flat-leaf parsley
  • 2  tablespoons crumbled feta cheese
  • 1/2  English cucumber, quartered lengthwise and sliced (about 1 cup)
Directions
Sprinkle both sides of flank steak evenly with garlic, salt, and black pepper. Massage seasoning into steak.

Combine pepperoncini pickling liquid, olive oil, and mustard in a medium bowl, stirring well with a whisk. Add chopped pepperoncini pepper, parsley, cheese, and cucumber to oil mixture in bowl; toss well to combine. 

Grill steak 5 minutes on each side or until desired degree of doneness. Place steak on a cutting board; cover and let stand 5 minutes. Uncover; cut steak diagonally across grain into thin slices.

Serve steak with relish.

Enjoy!!!

Sunday, March 07, 2010

NY Strip + cast iron skillet + oven = YUM!

Even though the weather isn't nice enough to head out to the grill, it doesn't mean that you can't enjoy a delicious steak at home.  When the weather isn't cooperating for grilling, the next best thing to do is to break out your cast iron skillet, crank the oven up, and have perfection in a matter of minutes.  It amazes us how easy and quick it can be to do a steak this way.  I learned how to cook steak this way thanks to the suggestion from several posters on insidecarolina.com's off topic board.  Cast iron skillets are a must-have for any and every kitchen.  They are so versatile and go into the oven without any problem!  I often wonder now how I lived without them before my mom got on a cast iron kick and bought me several for Christmas one year.  One thing that you can do that I don't for the recipe is to sear the steaks prior to putting them in the oven.  We've done it both ways, and either way, the steak turn out great!
Rick brought over the steak dust that his mother got.  It turns out that it is Tone's.  You can get it at Sam's Club and also order it online.  Instead of using the steak seasoning that he had, we used McCormick's Montreal Steak Seasoning.  We opted to go with that one because it smelled more garlicky than the other one.  As usual, we paired the steak with baked potatoes and had a great weekend night dinner! 

Here's what we did.

Cast-iron skillet steak

Ingredients
2 NY Strip Steaks (or cut of your choice)
1 tablespoon Tone's Steak Dust
1 tablespoon McCormick's Steak Seasoning
1 cast iron skillet!

Directions
Preheat oven to 500F.  

While the oven is preheating, mix the steak dust and seasoning together in a small bowl.  If you are doing more than 2 steaks, keep the proportion of seasoning be 1 tablespoon of each to 2 steaks.  Season both sides of the each steak with the seasoning by rubbing it in. Do not return the steaks to the refrigerator to allow them to warm up.

Place the steaks on the cast iron skillet and place the skillet in the oven.  Cook them for around 4 minutes on each side for steaks to be medium rare.  Adjust time for more or less doneness.

Enjoy!

Thursday, December 10, 2009

My do-it-yourself answer to the Japanese Steakhouse experience

Okay, so in all honesty, you aren't going to see my flinging shrimp at Rick to catch while he's sitting at the little bar in my condo as I cook, but I do like to make my version of the type of meal that you'll find at one of those hibachi-cook-it-in-your-face kinda places.  I'm a huge fan of them, and actually, my mom and I went to Yamatos while she was in town last weekend for my graduation.  Since Rick wasn't able to go, I thought I'd do the next best thing for him and fix it for him at home.  No, I don't have a hibachi grill, but a nice, big ole pan will work pretty well in my opinion.  This meal is another one that makes Rick's favorites list.


There are probably about a thousand ways to make fried rice, but personally, I go for simple and easy.  The only thing to keep in mind when making it is to use leftover rice or rice that has had a little while to cool (think a couple of hours here).  You can add whatever your heart desires to it...onions, carrots, peas, eggs.  In this version, I don't add anything.  Same thing goes for the veggies.  I usually do a sweet onion and a zucchini, but I've also been known to add mushrooms.  Since Rick doesn't like them, I don't include them that often anymore.  I wasn't in the mood for broccoli so I didn't include it.  Again, go with whatever strikes your fancy!


The one thing that makes this experience perfect is shrimp sauce.  You know what I'm talking about...that delicious pink sauce that they always serve at Japanese restaurants.  I do have a recipe for it, but a couple of years ago, I stumbled across a bottle of it near the seafood at Food Lion.  Imagine my delight and surprise to find it!


Two more things before I post the recipe.... First, I'd like to apologize for not having a picture of our meal, but it was scarfed down rather quickly last night. Also, I am happy to report that my blog has been include at petitchef.com!  Nothing makes me happier than having cooking site find me and ask me to list my blog on it!  I don't know if you've ever checked out the website, but it's really cool!  They've all kinds of different recipes and great pictures! Definitely check it out!  I love checking out different cooking blogs and all of the fantastic recipes I can find for inspiration.  Being new to the cooking blog world, I love venturing out from my old standard epicurious.com.  


Here's the recipe for your dining enjoyment!


Do-It-Yourself Japanese

For the day before (or a couple of hours before)

Ingredients
1 1/2 cups uncooked rice


Directions
Cook rice per instructions and store in the refrigerator overnight (or for a couple of hours to cool down).


For the day of:
Ingredients
Pre-cooked rice
1 pound shrimp, peeled and deveined, seasoned with salt and pepper

1 or 2 NY Strip Steaks, cut into 1-2 inch pieces, seasoned with salt and pepper
1 zucchini, quartered and cut into two inch pieces

1 sweet onion chopped
Toasted sesame seeds

Peanut oil
Sesame oil

Directions
In a large pan or wok (wok is better when you have a large amount of rice), heat a mixture of 1 tablespoon peanut oil and 1 tablespoon sesame oil over medium high heat.  Add rice to the pan and season with sesame seeds.  Fry for a few minutes (around 5) and use a spoon to break up the rice.  Add soy sauce and continue to cook.


In a separate pan, add 1/2 tablespoon peanut oil and 1/2 tablespoon sesame oil and heat over medium heat.  Add zucchini and onion, season with sesame seeds, and cook until they are tender.  Add soy sauce and cook for an additional minute.  Remove from the pan, place in a medium bowl, and cover to keep warm. Add steak to the pan and cook to desired doneness.  Add shrimp to the pan and season with sesame seeds.  Cook until the shrimp are pink.  Add the shrimp and steak to the vegetable mixture and mix. 


Place fried rice on a plate and top with shrimp mixture.  Serve with shrimp sauce.


Enjoy!

Sunday, August 23, 2009

A simple classic

Being on break is nice albeit a wee bit boring. Rick laughs at the fact that I get bored so easily which is even more frequent since I quit smoking. Luckily, it gives me more time and more opportunties to spend evenings with Rick. I think it adds to the love-hate relationship with being in school. I miss the days (and nights) of last summer when things like tests and clinicals the next morning didn't stand in the way of our spending time together and not to mention how annoyingly stressed out I'm sure that I am during certain times of the semester. I love him even more for putting up with me.

All that being said, this week Food Lion had t-bone steaks on sale at a ridiculously good price. Rick's mom had given him this wonderful (but kinda stinky) dry rub for steaks a while back, and we were more than happy to break it out twice this week for nights on the grill. It is a mixture of two different types of rubs, and when I find out the brands, I will edit and add them here so everyone can enjoy it, too!!!


Earlier, I confessed my fear of gas grills, and this week, that fear became a reality. Nope, the grill didn't blow up on us, but a poof of flame did leave Rick's right arm with quite a few less arm hairs. I'm not sure what happened with it, but he survived, and I have, once again, become a little timid around the grill.

To go with the steaks, I decided to go with the perfect pairing...potatoes. I opted to do mashed potatoes both nights. Usually when I make mashed potatoes, I do them the way that my Grandmother Elliott did and add onions to them, top them with cheddar cheese, and then bake them. We call them Nanny's Mashed Potatoes. This week, however, I didn't feel like dealing with the onions so I went for traditional mashed potatoes. The key to making perfectly fluffy mashed potatoes is to use a hand-held mixer. I used to torture myself and use a potato masher, but it never gave me the consistency that I craved. I do, however, start out the the masher before using the mixer. I just think that it's easier to mix with the mixer that way. Another thing that I did this week was to add heavy cream....evil, I know! I had bought it to make tomato basil crab bisque, and I figured that I wouldn't miss a couple of tablespoons. I also added a little bit of low fat milk as well so that I wouldn't use as much of the heavy cream. They turned out wonderfully!! I apologize for not having pictures again, but trust me, it was great!!!


Link within

Related Posts with Thumbnails